Body
Summary
This article explains how to add, edit and delete hotspots in your recordings.
Hotspots Window Layout
The Hotspots window has three main areas:
Left pane – Displays your media details and all the hotspots created for that media.
Right pane – Consists of:
- Media Player - The Kaltura Editor Player is defined in the Editor Module by your system administrator. Use to Preview your timeline modifications.
- Real-Time Input
- Play/Pause/Jump to start of next hotspot/Jump to start of previous hotspot buttons
Bottom pane – Displays the Timeline. The Timeline can be zoomed in/out to allow improved granulation of the timeline, and fine-tuning, and give a broader perspective when zoomed out.
The Timeline includes the following icons and tools:
- Real-Time Marker
- Zoom marker - use to enlarge the timeline display granularity
- Handlebars - Use to snap to a certain point on the video segment
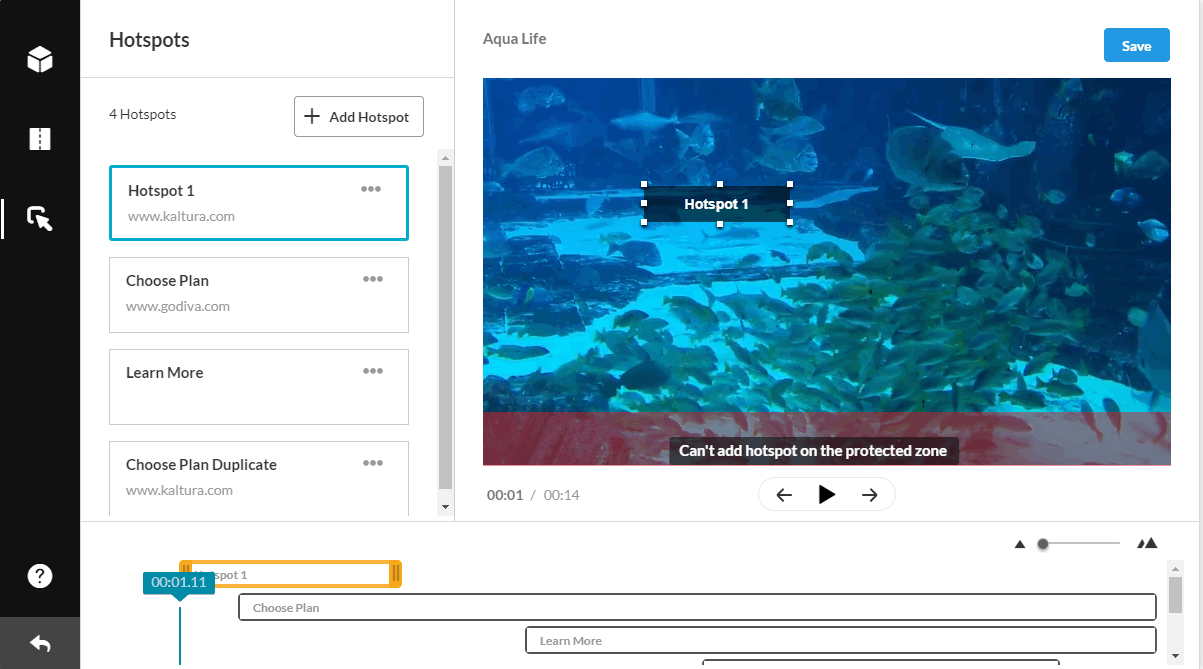
Hotspots Tab Player - Safe Zone
The bottom of the player, a visual rectangle, is reserved for player configuration and fields. Hotspots may not be created on this area and a warning message is displayed.
To zoom in/out of the Timeline
Drag the Zoom marker to the level of granularity you want to see. This naturally will increase the length of the visible Timeline, since more frames will be viewable.

Back to top
How-To
Task: Create a hotspot
Instructions
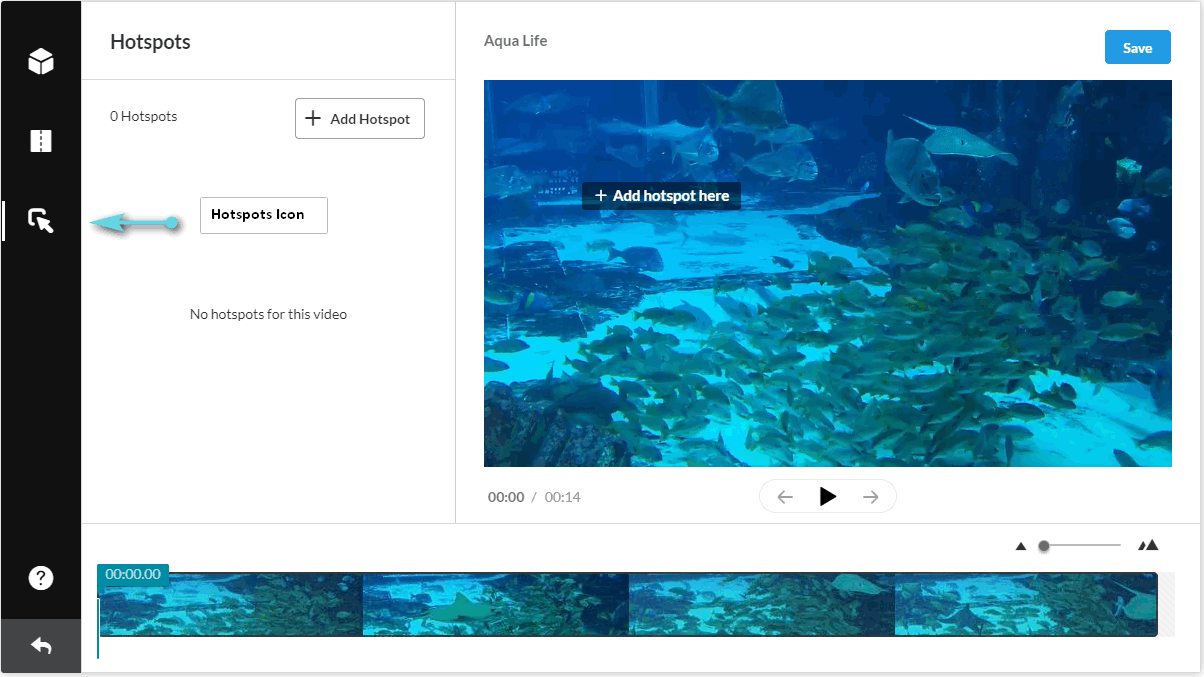
Step 1 - Launch the Kaltura Video Editor and click the Hotspots icon.
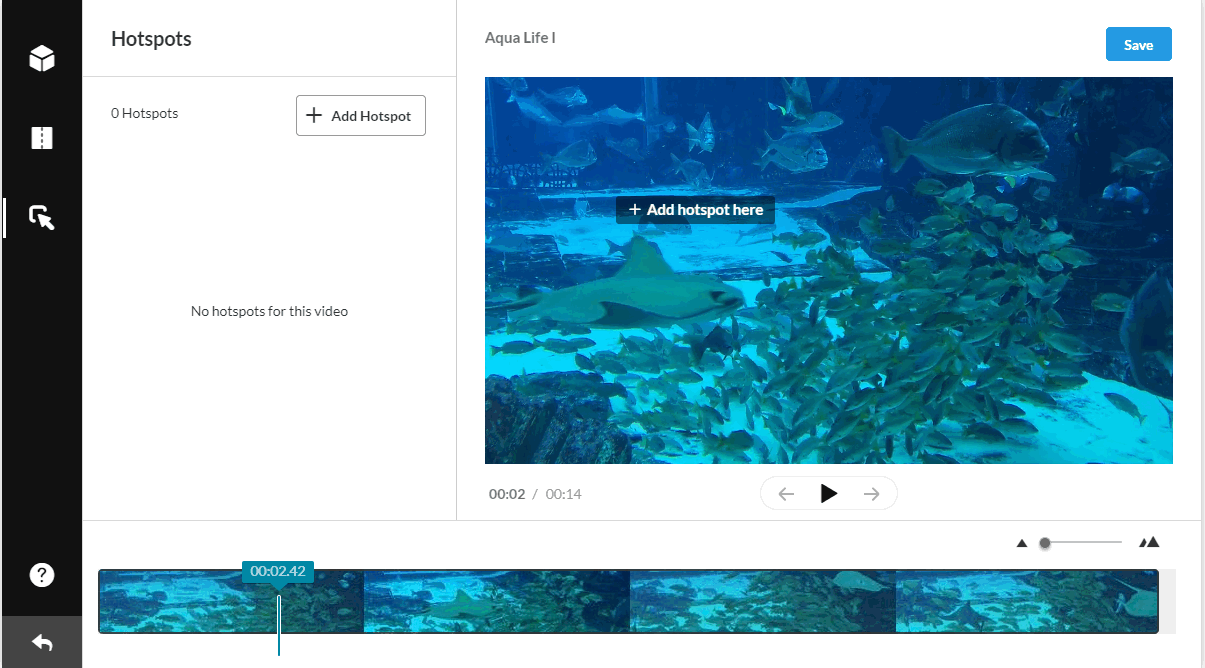
Step 2 - (Optional) Click Play. You can place a hotspot right on the video start, or seek straight to a certain point. You can also click play and add the hotspot after pausing.
Step 3 - Click +add Hotspot or hover over the player display area and click +Add hotspot here text. If hovering over the player, the hotspot is created over the selected position when clicking. If you use the button (in the left pane) the default position is at the top left of the player. A hotspot is created at the selected time on your media.
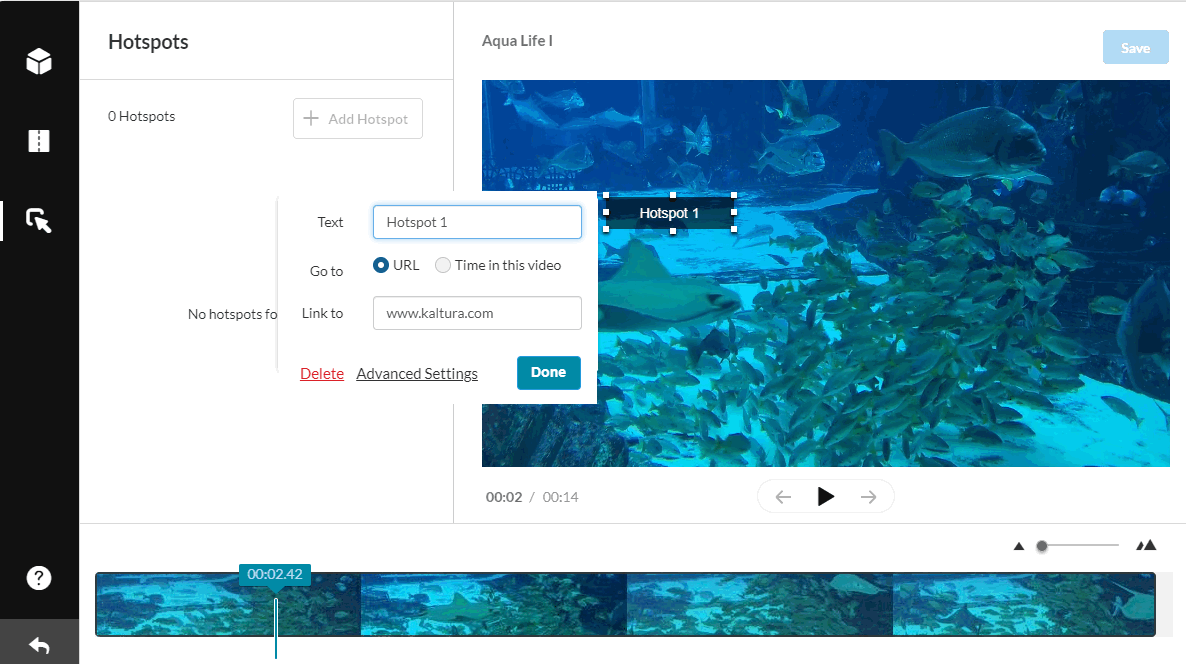
Step 4 - Create a hotspot. Enter Text for the Name of the Hotspot.
Step 4, Option A - Toggle Go to URL and enter a URL in the Link to field. Both Text and Link to fields are optional. You may want to create a transparent hotspot.
or
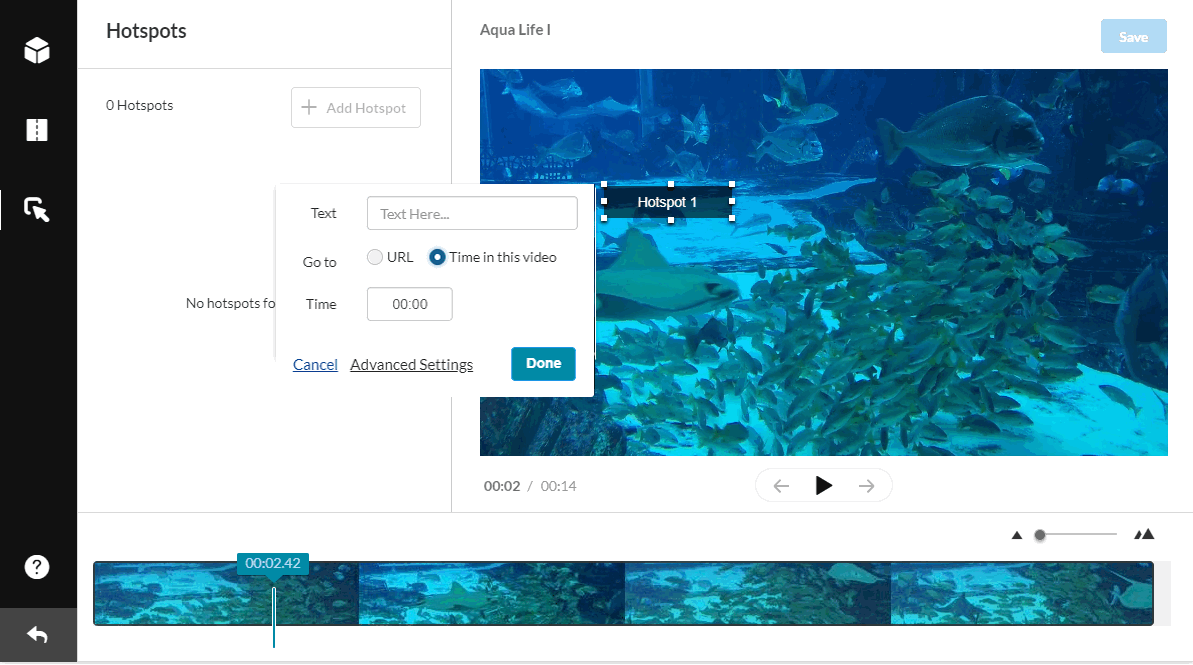
Step 4, Option B - Toggle Go to Time in this video. The Text field is optional. You may want to create a transparent hotspot.
Step 5 - (Optional) You can drag and drop the hotspot to another location on the player. The position and size can later be accurately adjusted with keyboard input, using the Advanced Settings panel
Step 6 - Click Advanced Settings to modify the other settings, for example, the display style and position for the selected hotspot.
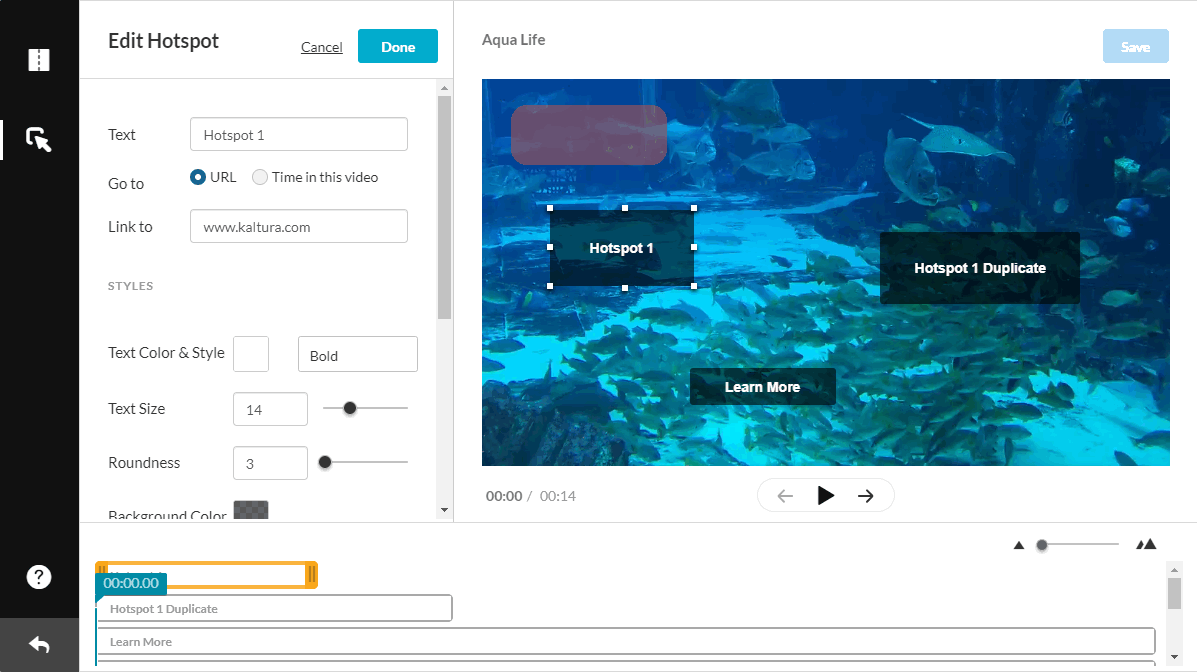
Step 6A - Click on the box next to Text Color to open the color palette and change the text color and use the drop-down to change the font-weight.
Step 6B - Use the slider to control the roundness.
Step 6C - Select a background color from the Background palette.
The following is an example of the Advanced Settings hotspots style change:
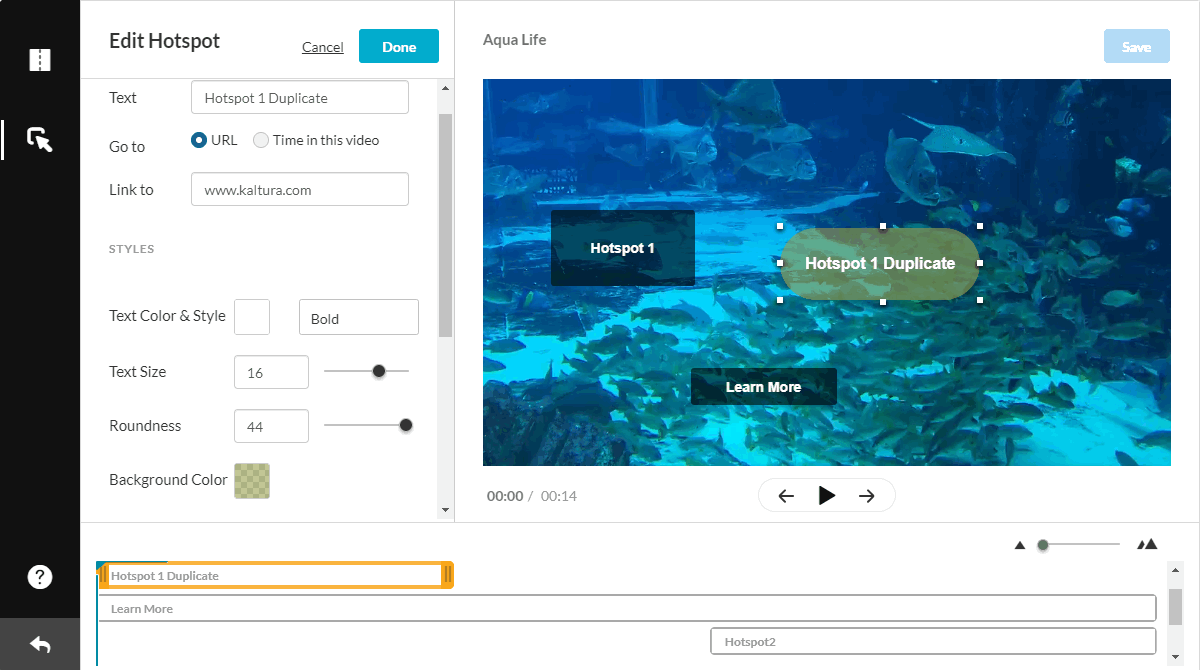
Step 6D - Scroll down to set the position, size, and start and end times for the selected hotspot. The position may be used to align your hotspots accurately on the display and depends on the player boundaries. The size is in pixels and should conform to your display screen configuration.
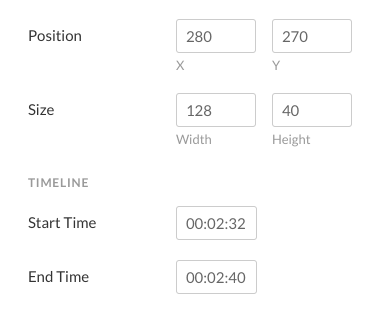
Step 6F - Enter the Position in x y coordinates. The 0,0 point is the top left of the player.
Step 6G - Enter the Width and Height. You can also re-size the hotspot using the handlebars.
Step 6H - Enter the Start and End Time for the selected hotspot.
Step 7 - Click Save to save your hotspots.
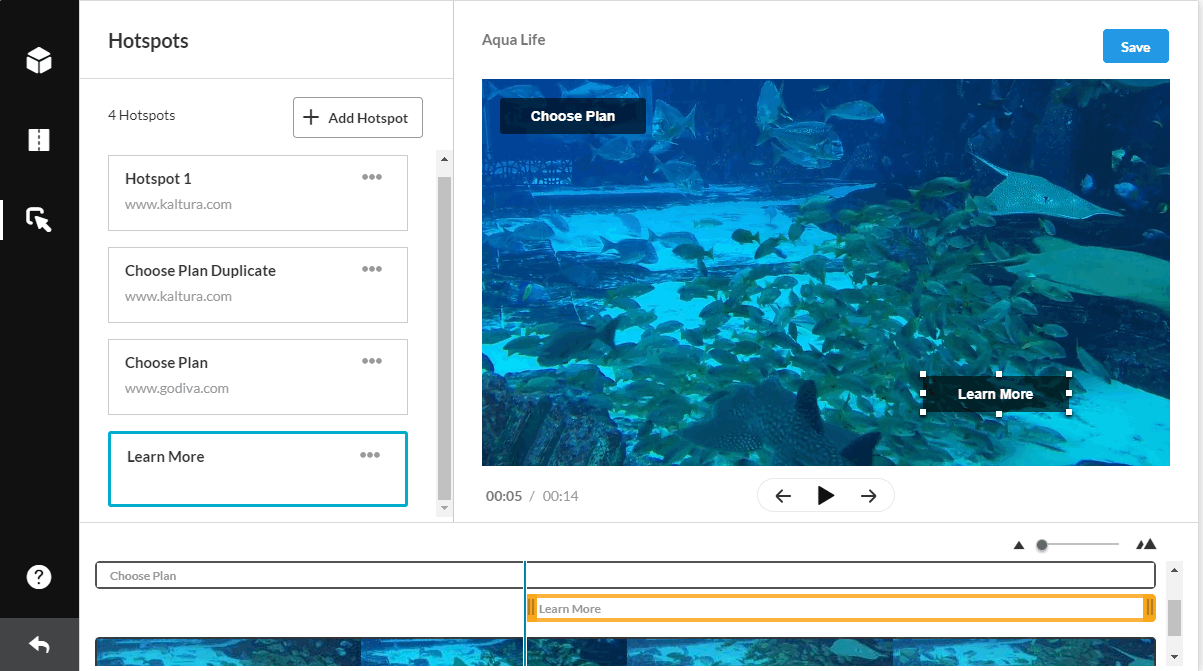
The hotspot is listed under your Hotspots list in the left pane. The duration of the hotspot is highlighted in the timeline in yellow with handlebars for editing. You can edit hotspots when creating them or after they are saved. There are several editing options.
Step 8 - If you change the Advanced Settings when creating a hotspot, the settings become the default settings for the current editing session. If you edit the Advanced settings for an existing hotspot, the default settings will not change.
Outcome
You are able to create a hotspot.
Back to top
Task: Edit a hotspot
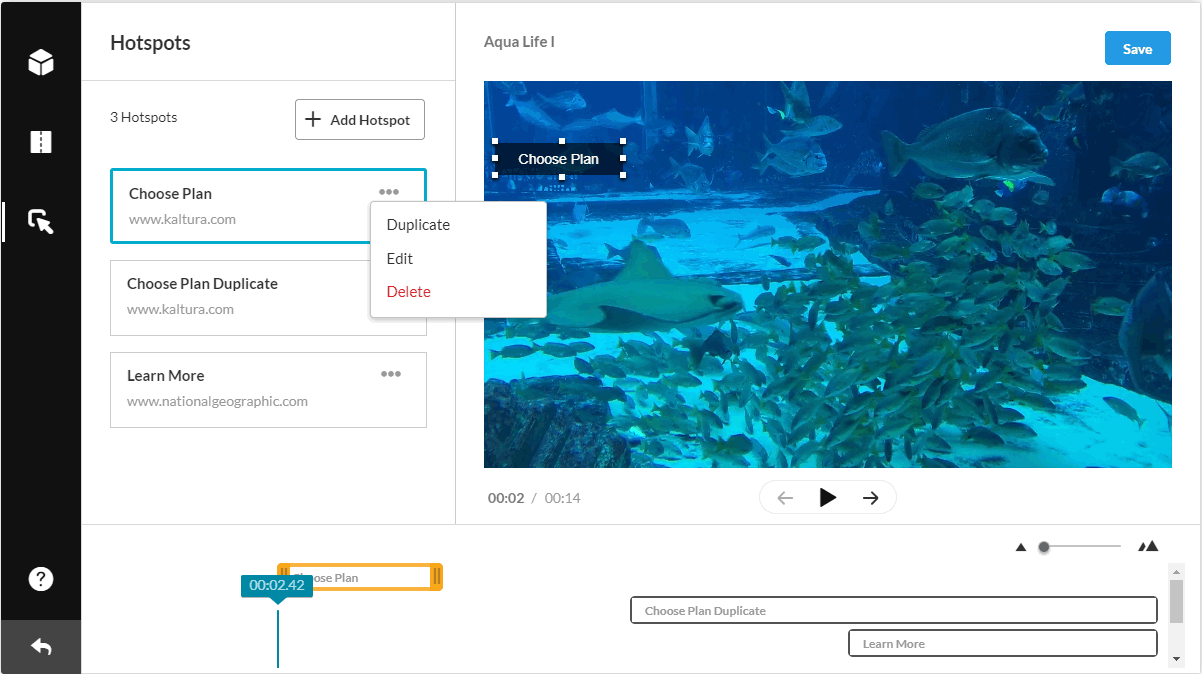
Each hotspot in the Hotspots list includes an action menu (3 dots). Use the Actions menu to Duplicate, Edit or Delete a hotspot. The order of the hotspots is according to the start time. If you change the start time in the timeline, hotspots will automatically reorder accordingly.
Instructions
Step 1 - Click on the hotspot on the player, or click on the hotspot in the hotspots list, or click on the Actions menu (3 dots) in the Hotspots display list and select Edit.
Step 2 - Modify one or more fields (including Advanced Settings) of the hotspot display.
Step 3 - Click Done.
Outcome
You are able to edit a hotspot.
Back to top
Task: Duplicate a hotspot
Instructions
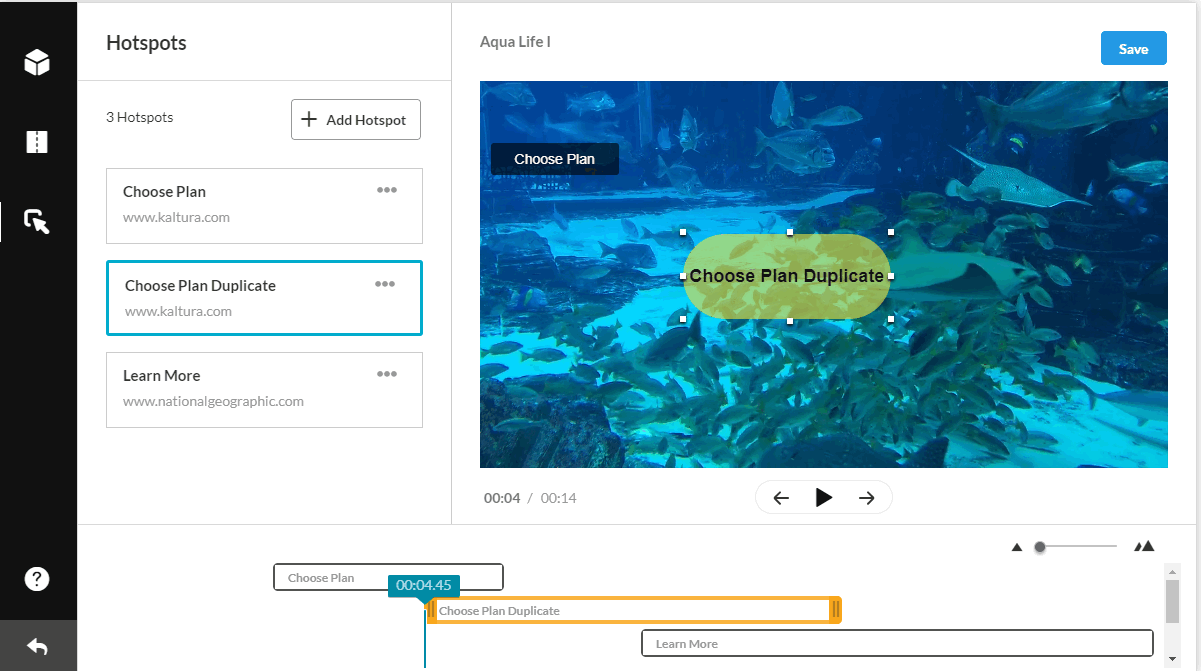
Step 1 - Click the Action Menu (3 dots) in the Hotspots display and select Duplicate.
Step 2 - After you duplicate a hotspot, you may rename the hotspot, change the Link to field or Time in the video, change the Advanced settings, and change the duration and the location.
Outcome
You are able to duplicate a hotspot.
Back to top
Task: Resize a hotspot
Instructions
Step 1 - Grab one of the handles on the hotspot to resize (increase or decrease) the hotspot's size.
Step 2 - Click and drag the hotspot to its new location.
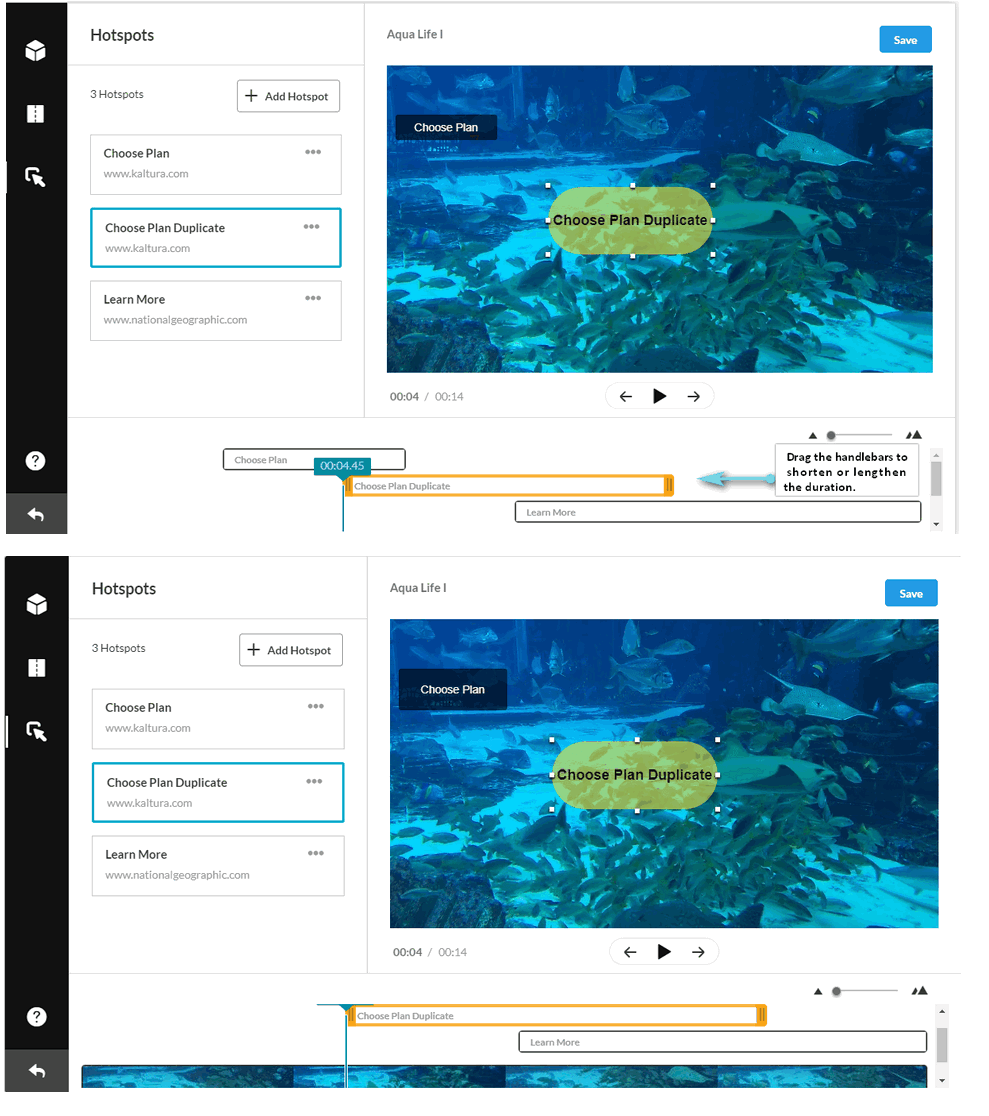
Step 3 - To edit hotspots using the timeline
Step 4 - Use the yellow handlebars to shorten or lengthen the hotspot duration on the Timeline.
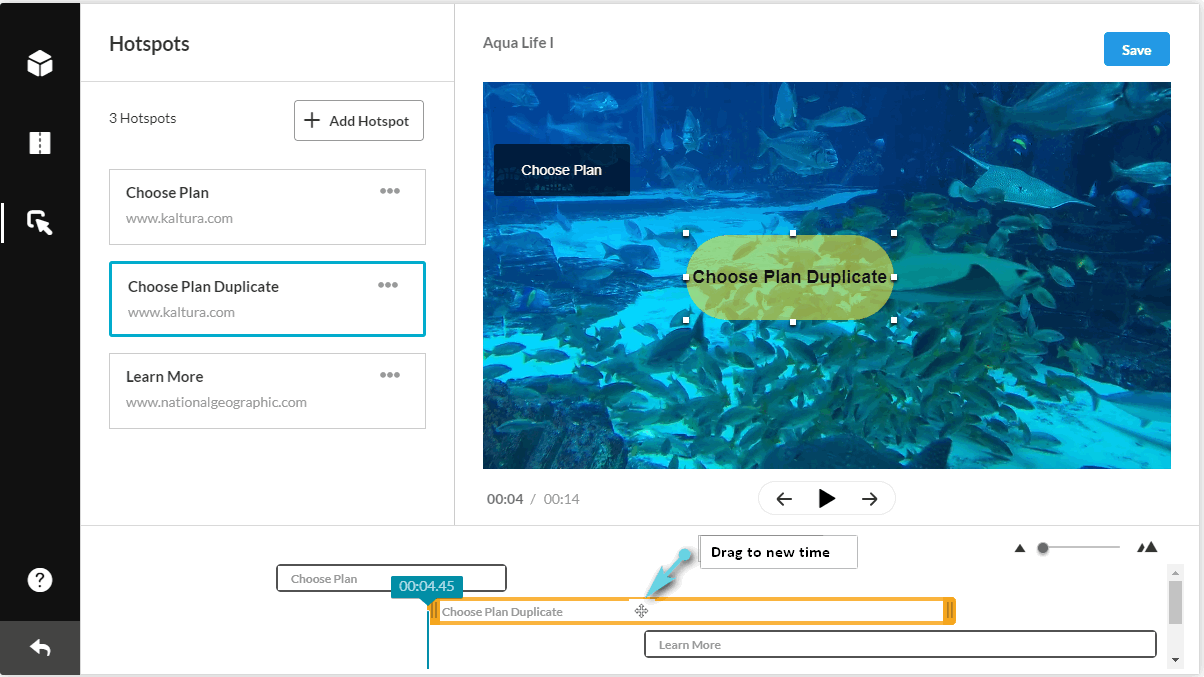
Step 5 - Drag and drop any of the yellow segments (hotspot indicators) to any location on the video timeline.
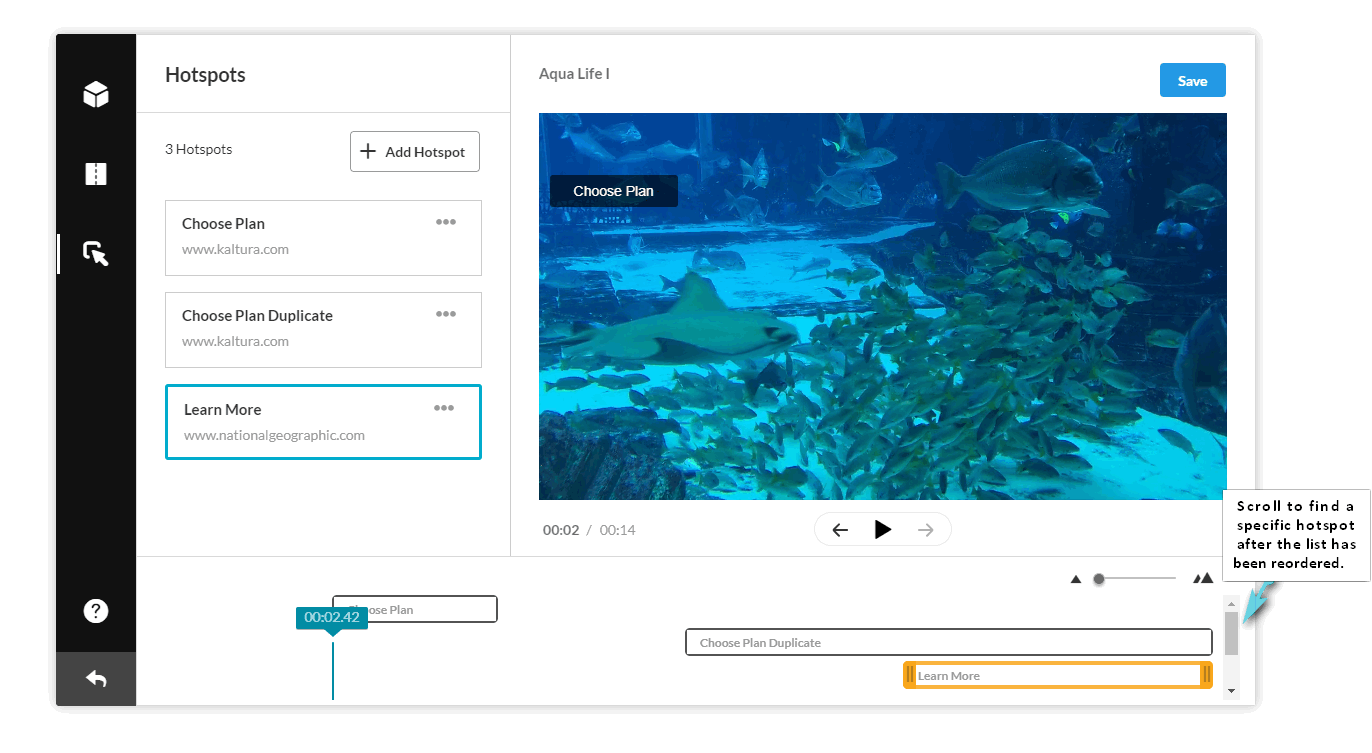
Step 6 - Use the Scroll on the right side to see the hotspots created for your media. Scroll to find a specific hotspot after the list had reordered
Outcome
You are able to resize a hotspot.
Back to top
Task: Delete a hotspot
Instructions
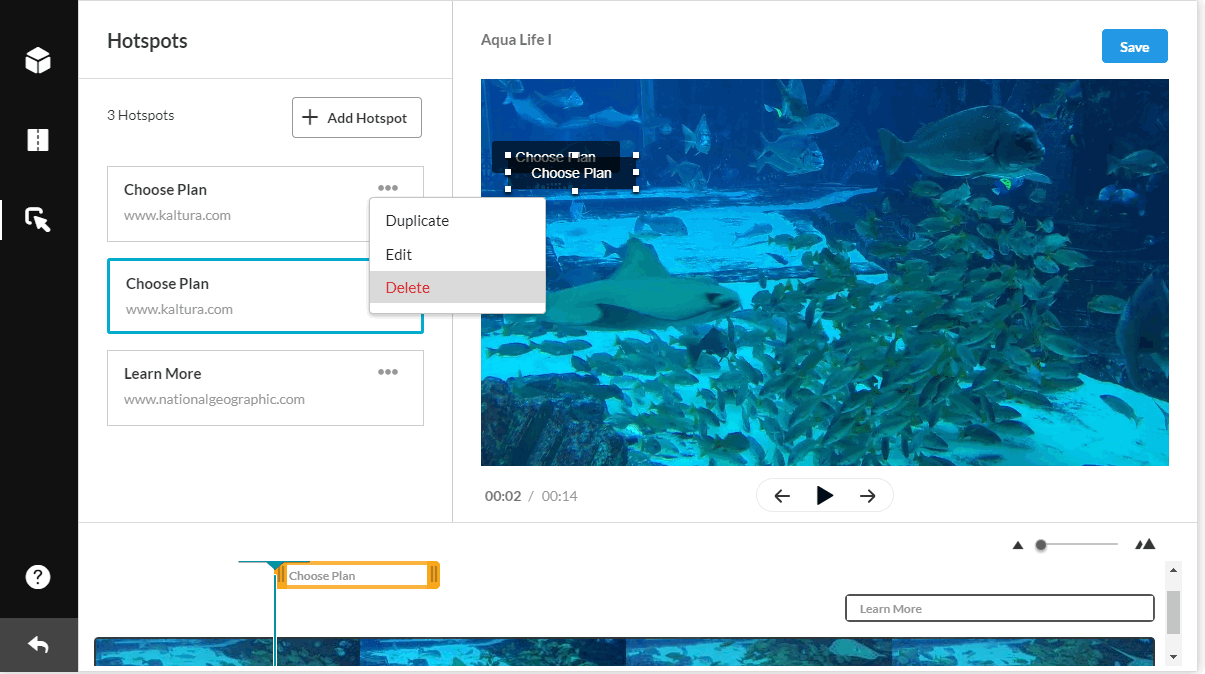
Step 1 - Click the Action Menu (3 dots) in the Hotspots display and select Delete.
Step 2 - A delete confirmation is displayed. Click Delete Hotspot to confirm.

Outcome
You are able to delete a hotspot.
Back to top
Display Media with Hotspots in My Media
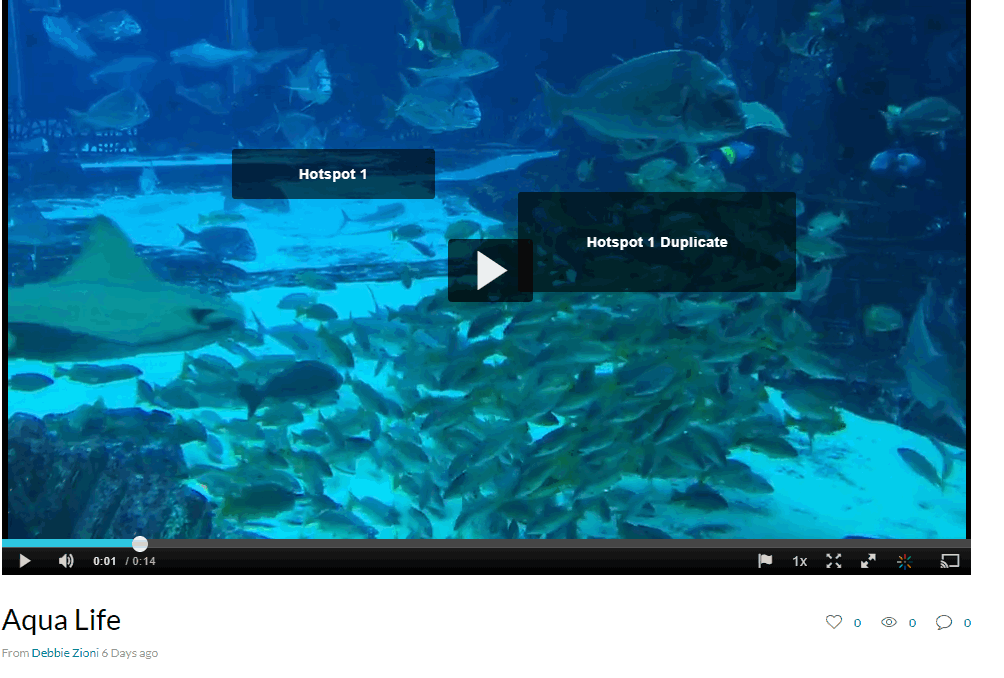
After you save hotspots, you can view them in your media. The hotspots are displayed on top of the player with a real-time update during play and seek.
Clicking on a hotspot opens the Link to the URL in a new tab and pauses the video. Hotspots without a URL are not clickable, and the video will continue to play.
Back to top
Need additional help?
Please fill out a Lecture Capture support request with as much information as possible or visit the Technology Help Desk Support page to locate your local campus contact information. For password issues you must call or visit the Help Desk in person.