Body
Summary
This article provides instructions on how to create shareable file/folder links, invite, and manage collaborators in OneDrive.
| Sharing Files |
Creating a Sharable Link |
 |
 |
Content
Important! Your USNH OneDrive for work or school account is not intended as the primary source for storing large amounts of department owned data (like SharePoint). It does NOT retain permanency and is subject to deletion when your employment or student status expires. If you are a collaborator in a OneDrive file that belongs to a departing individual, you will also lose access to that data unless it is moved or copied into a folder you own. See FAQ's for Graduating Students, Moving Institutional Files to SharePoint before leaving USNH and Copying Personal Files/Folders before Leaving the University for more information.
OneDrive can be used to share photos, Microsoft Office documents, other files, and entire folders with people. Files and folders in OneDrive are private until you decide to share them and you can see who a OneDrive file is shared with or stop sharing at any time.
Users with a sharing link to only a file cannot upload new items. Keep in mind that the link can also be forwarded and sign-in is not required.
Follow the link to the task you want to achieve:
How-To
Task: To share files/folders using the web
Instructions
Step 1 - Open OneDrive for Business and sign in.
Step 2 - Select the file or folder you want to share by selecting the circle to the left of the file name. Multiple items can also be shared at once.
Step 3 - Select Share at the top of the page.

Step 4 -Select Specific People with the link can edit to customize the link options.
Note: If a sharing option has been greyed out, your organization's administrators may have restricted them. For example, they may choose to disable the Anyone option to prevent usable links being forwarded to others. Specific people includes users external to USNH.

Step 5 - Configure the options for the link, then select Apply.
By default, Allow editing is turned on. If these files are meant to be view only, uncheck the check box. This can be further restricted by selecting the option to Block download, which means they cannot save a local copy.
- Allow editing - This option allows other to edit the shared files, and can add or delete files in a shared folder. Recipients can forward the link, change the list of people sharing the files or folder, and change permissions for recipients. People with Edit permissions can copy, move, edit, rename, share, and delete anything within a shared folder
- Unchecking this box means that people can view, copy or download shared items without signing in. They can also forward the link to other people. However, they cannot make changes to the original file in the owners OneDrive.
- Set expiration date - The link will only work until the set date. After that, the link will be invalid, and another link will need to be created for users that still require access to the file/folder.
- Set password - When a user clicks the link, they will be prompted to enter a password before they can access the file. This password will need to be provided separately to users.
- Anyone gives access to anyone who receives this link, regardless of how they acquire it. This may include people outside of your organization.
- People in <Your Organization> gives anyone in your organization who has the link access to the file, regardless of how they acquire it. Our organization is anyone at any of the USNH schools or offices.
- People with existing access can be used by people who already have access to the document or folder. It does not change the permissions on the item. Use this if you just want to send a link to somebody who already has access.
- Specific people gives access only to specified users, including those external to USNH. Although other people may already have access. If people forward the sharing invitation, only people who already have access to the item will be able to use the link.
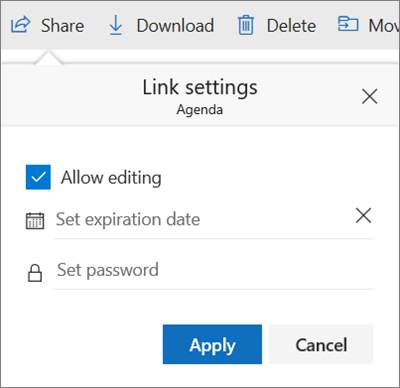
Step 6 - From the main Share box, select Copy Link to copy the link to the clipboard.
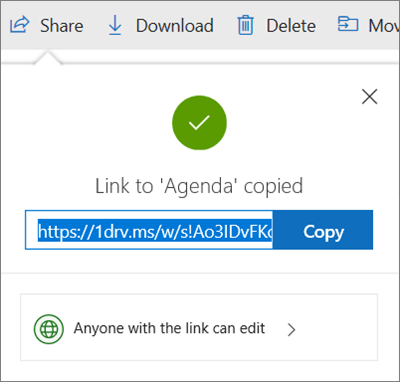
Step 7 - Paste the link in a message to the recipients.
Outcome
Recipients of the shared link can access the file or folder.
Back to top
Task: To send an email invitation that includes a link to a shared file.
Notes:
- This option allows users to keep track of who has access to their shared files.
- This lets users remove permission for specific individuals or groups later if necessary.
Instructions
Step 1 - In the Enter a name or email address field, start typing the email addresses or contact names of users the share the file/folder with.
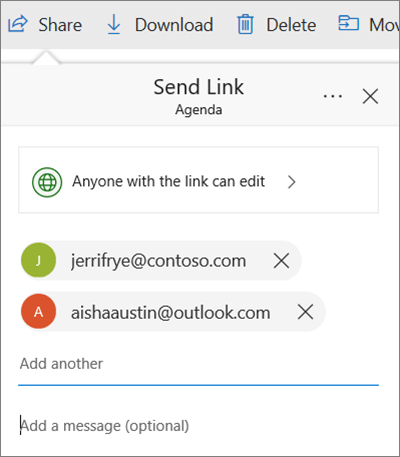
Step 2 - (optional) Add a note to the recipients.
Step 3 - To change the permission level, click in the box that says, "Anyone with the link can edit".
Step 4 - Configure the options for the link, then select Apply.
Outcome
Recipients of the shared link can access the file or folder.
Back to top
Task: To share a folder with a group.
When sharing folders with edit permissions, users the folders are shared with can add the shared folders to their own OneDrive. This lets them keep the folder alongside their own folders and items, easily move items between folders, and more easily work on it offline. Any updates they make are synchronized with the shared folder, so everyone with access to the folder is up to date.
Note: The recipient can only add shared folders to their OneDrive, not individual files.
Back to top
Task: To invite collaborators.
Instructions
Step 1 - Select the files or folder to share.
Step 2 - Select Share  .
.
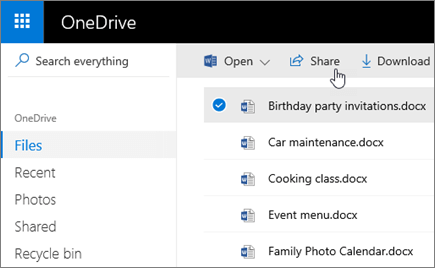
Step 3 - Select Anyone with this link can edit this item and set the permissions.
- Select Allow editing to allow other users to be able to edit the file.
- Uncheck Allow editing to restrict users to view only mode.
Step 4 - Select the preferred method of sharing.
- Get a link - Select Copy and paste the link into a message, file, webpage, or other location.
- Email - enter the emails of the users to share with, add a message (optional), and select Share.
- Social network - Select More, select the preferred social network site.
- This may be disabled for work or school accounts.

Outcome
Recipients receive information to access the file or folder based on preferences.
Back to top
Task: To share files/folders using the desktop application.
Instructions
Step 1 - Open the desktop app using the OneDrive icon in the lower right dashboard of the computer. If you do not see the Blue Cloud symbol you may need to use the up Arrow to view more icons.

Step 2 - The application opens with a file structure very similar to Windows Explorer displays. Right-click on the folder or file to share and use the Share option from the menu.

Step 3 - From here use the instructions above starting at step #4.
Outcome
Recipients receive information to access the file or folder based on preferences.
Back to top
Task: To stop/modify sharing.
Owners or users with edit permissions can stop or change the sharing permissions.
Instructions
Step 1 - Select the file or folder you want to stop sharing.
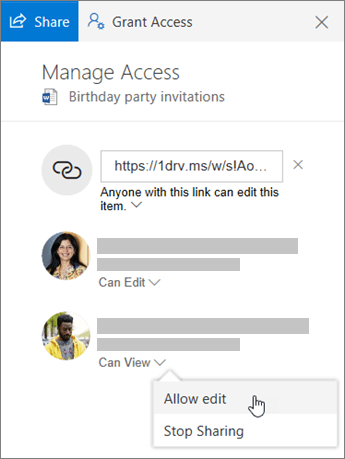
Step 2 - Select Information  in the upper-right corner to open the Details pane.
Step 3 - Select Manage access and:
- Select the X next to a link to disable it.
- Select Can Edit or Can View, and then select Stop Sharing.
- Select Can Edit or Can View and then select Change to….
Outcome
The files/folders access is modified based on preferences.
Back to top
Further Readings
SharePoint: Sharing Site/Team Files
See who a file is shared with in OneDrive or SharePoint
Stop sharing OneDrive or SharePoint files or folders, or change permissions
Get started with OneDrive - from USNH Microsoft 365 Learning Pathways
Need additional help?
For assistance concerning site creation, content sharing, file synchronization, or other common SharePoint, OneDrive, Teams, or Office app activities, we recommend our Microsoft 365 Learning sites:
Learn more about the great tools our Microsoft 365 Learning sites offer!
Visit the Technology Help Desk Support page to locate your local campus contact information or to submit an online technology support request. For password issues you must call or visit the Help Desk in person.